Hi All,
I will be continuing my blog post and this time I will walk through installation and configuration of SQL Server 2008 R2 and SharePoint 2010.
Lets get started.
Setting up a SQL Server 2008 R2 instance:
Step1:
Install trail version of SQL Server 2008 R2 Enterprise version and click set up file.


Connect to the instance of SQL Server, and then run the following query
Connect to the instance of SQL Server, and then run the following query


I will be continuing my blog post and this time I will walk through installation and configuration of SQL Server 2008 R2 and SharePoint 2010.
Lets get started.
Setting up a SQL Server 2008 R2 instance:
Step1:
Install trail version of SQL Server 2008 R2 Enterprise version and click set up file.

Step 2:
We may get some warnings such as domain controller and Windows firewall but skip them and click on the Next button.

Step 3:
The screen asks for kind set up roles. We supply "SQL Server Feature Installation" and click on the Next button.

Step 4:
The wizard asks for features to be installed and click on the Next button.

Step 5:
We have to select SQL Server instance, choose "Default instance" and click on the Next button.
We have to select SQL Server instance, choose "Default instance" and click on the Next button.

Step 6:
The wizard requires "Server Configuration". and for the service account, we will supply sp_sql and click on the Next button.

Step 7:
In the database configuration we will enter "Administrator" and "sp_admin" as the SQL server administrators and click on the Next button.

Step 8:
The wizard checks installation configuration rules and click on the Next button.

Step 9:
"Ready is install" is shown up, it will displays SQL instance details. We double check our configuration and click on the Next button.
"Ready is install" is shown up, it will displays SQL instance details. We double check our configuration and click on the Next button.

Step 10:
The set up will take few minutes and displays successful message.

Configure SQL Server 2008 R2 instance:
Step 11:
All Programs >> Microsoft SQL Server 2008 R2 >> Configuration tools >> Click on SQL Server Network >> Select "Protocols for MSSQLSERVER" and for option toggle TCP/IP to Enable.

Step 12:
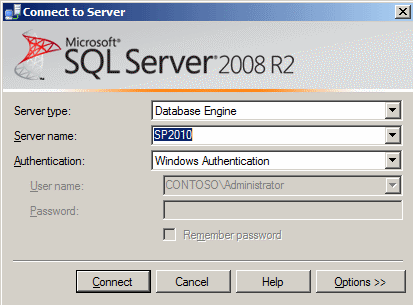
Now we navigate to the "SQL Server Management Studio" and connect to the SQL server instance.
Step 13:
Go to Security section >> Right click on "sp_admin" service account and give db_creator and securityadmin roles.

Step 14:
Download the SQL server 2008 R2 SP1 on the server.

Step 15:
The wizard will indicate the patch level of current SQL server instance.The current SQL server patch level is 10.50.1600.1

Step 16:
The wizard show the update version.

We can navigate to check the updated patch level by querying in SQL Server management console:

These are handy scripts to determine SQL Server 2008 editions and patch levels.
Connect to the instance of SQL Server, and then run the following query
Select @@version
Connect to the instance of SQL Server, and then run the following query
SELECT SERVERPROPERTY('productversion'), SERVERPROPERTY ('productlevel'), SERVERPROPERTY ('edition')
Here is the MSDN link for more info.
Install SharePoint 2010:
SharePoint 2010 installation is quite pretty straightforward. However, we have to be careful while configuring it. There are brief topics which we will cover.
- Installing SharePoint 2010 prerequisites.
- Lay down the SharePoint 2010 binaries
- Run the PS config. Part does lot of things such as link up the SQL Server i.e. provision the SP 2010 farm configuration database, specific service accounts, passphrase which is new to SP2010 and provision Central Administration web application)
- Configure the SharePoint farm either by wizard or manually.
Step 17:
Navigate to download link and go to default.hta (and not the setup.exe). "Default.hta" will display a splash screen and we have click "Install software prerequisites"

Step 18:
The installation requires necessary components to function. Please note that there are few components such as SQL Server and IIS that are required:

Step 19:
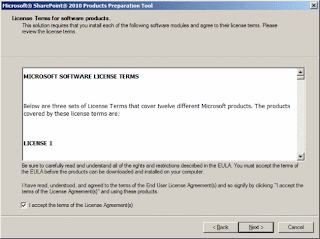
The license terms (for the prerequisites) has to be accepted.
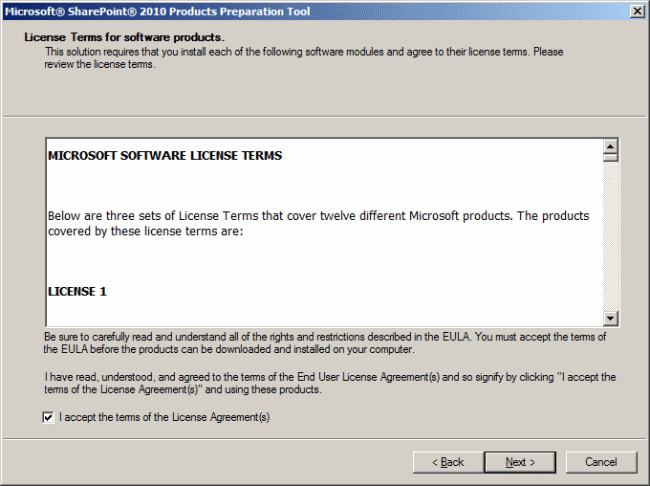
The wizard will install prerequisites

Step 20:
The license terms (for SharePoint 2010 Products) has to be accepted along with license key:

Step 21:
We now have to furnish the file location where SharePoint 2010 would be installed on the Windows Server 2008 R2. Apparently, in MOSS 2007 if we made a wrong choice on this page then we would have plenty of problems.

Step 22:
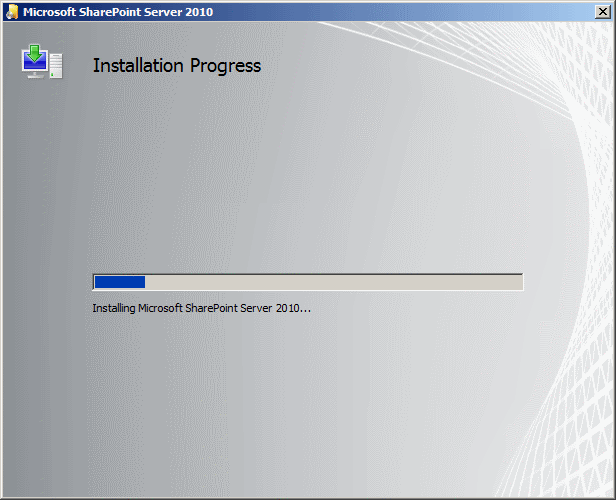
The SharePoint 2010 wizard install the binaries as shown below
Step 23:
The final screen show us that we have to run the SharePoint Products Configuration Wizard.

Step 24:
In this wizard we have to supply name of the database, where its stored as well as the service account for the database access.Click on the Next button.

We are prompted with a warning and we click "Yes" and proceed.

Step 25:
We will connect to a new server farm

Step 26:
This is crucial screen for SharePoint 2010 configuration. In this screen we have to provide:
Database server: <<SQL Server Instance>> ( for us its SP2010 DB instance)
Database name: SharePoint_FarmConfig. SharePoint will create an instance within SQL Server. It stores metadata and configuration settings for the entire farm.Its a good practice to have a descriptive name of the database.
Database Access Account: It will instruct windows to create a log in to SQL server to give access for SharePoint and create database. This service account which we will plug in, automatically be granted "dbcreator" and "securityadmin" roles as mentioned in my previous blog post.

Step 27:
This is added security for SharePoint 2010 where passphrase to secure farm configuration data. For my usage I entered sp2010!sp2010!

Step 28:
We provide SharePoint Central Administration Web Application and specify port number:

Step 29:
The SharePoint 2010 wizard would display summary of our configuration settings that would be applied to the server.

Step 30:
The SharePoint 2010 configuration kicks in and provision configuration database etc.

After SharePoint configuration is completed the wizard will display "Configuration Successful" and we click on the "Finish" button.

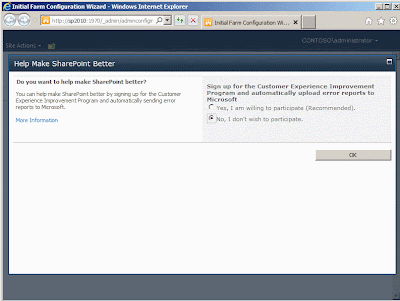
Step 31:
When we click on the Finish button, an Internet Explorer window will open up and prompt to sign up for the customer experience improvement program. We choose "No" and click OK button.

Step 32:
The next screen will prompt us to "How do you want to configure your SharePoint farm?". We choose "Start the wizard" option.

Step 33:
We create a new managed account "administrator", keep all default settings and click on the "Next" button.

Step 34:
SharePoint 2010 will churn out and provision a new web application.

Step 35:
We simply click the "Skip" button and Central Administration would complete the farm configuration wizard.

We then navigate to the "Application Management" and view the Web Application list. The "SharePoint - 80" web application is already provisioned for us.
I hope this walk through is useful.
Cheers,
Aroh


No comments:
Post a Comment